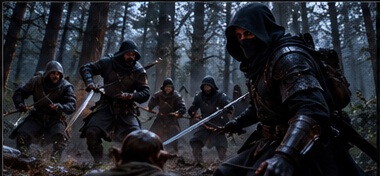
Ambush on the Road — The Black Briars
Encounter type: Roadside ambush, tactical combat, possible interrogation, and an optional physical clue. Placement: After the funeral of Matthias Veyr in Vauclerc, while the characters return to Stahlburg. Status: Game Master draft; adjust enemy statistics to the party’s level and system.
1. The Road Back to Stahlburg
The road out of Vauclerc threads through low hills, wet pasture, and stands of wind-bent trees. The town’s funeral bells have long since faded. The characters carry what they learned about the sealed well and may be planning what to tell their employers or Brother Aldren. Near a narrow crossing, a fallen cart partially obstructs the track. No one is visible beside it.
Read or paraphrase: The road bends between a mossy embankment and a tangle of bare branches. A cart sits crooked across the ruts, one wheel splintered. Beyond it, the way is quiet—too quiet for a traveled road.
2. What the Black Briars Want
The Black Briars are professional hired blades, not the desperate villagers who previously raided Stahlburg for food. Konrad Falkenrath hired the Black Briars to attack the investigators. He had learned that the party passed through Stahlburg and was traveling toward Vauclerc, where Matthias Veyr had died. Konrad anticipated their return and ordered the mercenaries to intercept them on the road before they could connect the outbreaks and the Order’s deaths. He paid partly with the signet taken from Canon Kessler. The mercenaries were given the party’s description and expected route, not Konrad’s true identity or the conspiracy’s purpose. They are not eager to die for the contract. If questioned, they can describe the employer, the payment, and the order to stop the travelers, but they cannot explain the underlying revenge. The employer supplied descriptions of the party and the Vauclerc road, paid partly with Kessler’s signet, and did not give his real name. The ring is discovered only if the party searches the mercenaries or their belongings; it is not worn openly.
Their leaders are Harl Brenner, a practical veteran who directs the attack, and Kester Vale, a quicker, watchful fighter who handles flanking and withdrawal. Both favor getting paid and surviving over heroic last stands.
3. Running the Ambush
| Feature | At the table |
|---|---|
| The obstruction | A broken cart blocks the easiest path. It offers partial cover and forces the party to slow or go around. |
| High ground | A low bank and brush on one side conceal one or more attackers and provide cover. |
| Flanking route | A shallow ditch or livestock trail lets Kester approach from the side. |
| Visibility | Overcast daylight; the attackers rely on terrain and timing, not magical darkness. |
| Escape route | The mercenaries have a path back into the trees and will use it if the fight turns. |
| Clues before combat | Disturbed mud, an unnatural lack of birdsong, a glimpse of a boot, or a second set of wheel tracks may reward attentive players. |
Opening beat: Give alert characters a fair opportunity to notice the setup. If they spot it, they may bypass the obstruction, call out the hidden attackers, turn back, or choose the terms of the fight. Do not force surprise simply because this is written as an ambush.
4. Combatants and Tactics
| Combatant | Behavior |
|---|---|
| Harl Brenner — leader | Holds a defensible position, directs allies, and tries to isolate the party’s strongest combatant. He offers terms if his advantage disappears. |
| Kester Vale — flanker | Uses brush and the ditch to threaten exposed characters, then retreats rather than fight alone. |
| Additional Black Briars | Use enough ordinary mercenaries for the party’s level. They follow orders, use cover, and break when the fight becomes unwinnable. |
System and balance: No fixed challenge rating, armor class, hit points, or attack bonuses are assigned yet because the party’s level, size, and ruleset have not been confirmed. Start with two named combatants and add supporting mercenaries only as needed. The intended difficulty is a consequential tactical encounter, not an unavoidable party wipe.
- First exchange: The Briars try to halt the party at the cart while Kester maneuvers toward an exposed flank.
- If pressed: Harl calls for a focused retreat; injured mercenaries look for chances to surrender or flee.
- If negotiated with: They may demand the party’s notes or proof of what was learned in Vauclerc, but they will not volunteer their employer’s identity.
- If the party escapes: Let them reach Stahlburg. The ambush establishes that someone is watching their investigation even if no one is captured.
5. Interrogation and Evidence
A captured Black Briar knows this was a paid job and may describe the rendezvous, payment arrangements, or a messenger’s appearance. Avoid giving them knowledge of Elias, the Order of the Sacred Vigil, or the full revenge plot unless later revisions establish a convincing reason. Harl and Kester can disagree on what they were told; neither should become a convenient exposition device.
| Approach | Possible result |
|---|---|
| Calm negotiation | A captive admits they were hired to stop travelers returning from Vauclerc. |
| Credible leverage or proof | The captive may describe the payment or where instructions were received. |
| Threats or violence | May produce silence, lies, or desperate bargaining rather than reliable truth. |
| Letting a mercenary go | Could yield a future rumor, a warning, or a recurring enemy—at the GM’s discretion. |
6. The Unidentified Signet Ring
Important: this clue is conditional. The ring is not displayed or worn by any Black Briar. It is tucked into a pouch among payment and ordinary personal effects. The characters discover it only if they overcome or capture the mercenaries and search the relevant belongings. Do not automatically award it for surviving the ambush.
The ring is a heavy religious signet with a distinctive, unfamiliar device. It appears valuable and may be recognized as an ecclesiastical or official object, but its owner is not identified during this encounter. In particular, do not reveal Canon Severin Kessler’s name here. The ring’s history belongs to a later investigation.
GM-only continuity: The ring belonged to Canon Severin Kessler. Elias’s vengeful brother took it after killing Kessler and used it to pay the Black Briars. The characters do not yet know this. Its presence is evidence to pursue, not an immediate solution.
7. Outcomes and Fail-Forward
| Outcome | Consequence |
|---|---|
| Party wins and searches | They may recover the signet ring and any ordinary evidence the GM places with the mercenaries. |
| Party wins but does not search | They gain the victory and possibly captives, but not the ring. |
| Mercenaries surrender | The party may question them and inspect their surrendered possessions, if they choose. |
| Briars escape | The party continues to Stahlburg; the ring and employer trail remain unresolved. |
| Party retreats or evades | They reach Stahlburg without the ring, with evidence that someone tried to stop them. |
| Party is defeated | Consider capture, loss of notes or supplies, or being left injured rather than assuming an automatic total-party kill. |
8. Transition — Return to Stahlburg
Whatever happens on the road, the party has reason to return to Stahlburg with evidence about the poisoned well. Brother Aldren remains an obvious person to question about Matthias Veyr. But when they arrive, they will learn that Aldren is already dead. The next chapter begins with that discovery; the ring, if recovered, is a separate clue that may gain significance later.