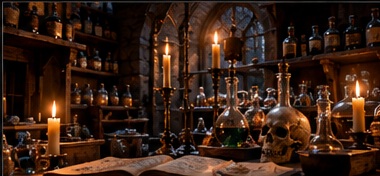
The Poisoner’s Trail — The Necromancer’s Laboratory
Placement: After Tracing the Order. Adventure type: Investigation with an optional five-room dungeon. Purpose: Determine how someone acquired toxin research without falsely making the necromancer responsible for the Dancing Plague. The dungeon’s master is an unrelated campaign hook.
1. The Return to the Laboratory
By now the party has evidence that contaminated water caused the dancing, while the deaths of religious officials point to a separate revenge plot. The reclusive necromancer outside Stahlburg remains an obvious source of specialized knowledge. His acolyte’s purchases resemble some of the materials needed to manufacture the toxin, but neither man has been shown to have poisoned a well.
Read or paraphrase: The path climbs past neglected orchard trees to a low stone building with shuttered windows. An acrid, medicinal smell leaks from the chimney. A worktable is visible through the open door, its glassware still warm. Somewhere deeper in the building, something heavy scrapes against stone.
The necromancer, Magister Oren Vahl, is wary of armed strangers and has reason to fear the city’s authorities. His acolyte, Lenna Drost, purchased the herbs and reagents on his instructions. These names are specific to this optional branch; neither character is secretly the plague murderer.
2. Confrontation, Flight, or Conversation
Vahl will initially defend his research as medicinal, alchemical, and necromantic experimentation. If the party arrives threatening violence or carries official orders to arrest him, he flees through a concealed service passage into an adjoining hillside refuge. If approached carefully, he may speak voluntarily and offer to show selected research notes. His flight is a response to fear, not proof of guilt.
A sudden disturbance from the sealed inner rooms can interrupt either approach: old protective dead, left behind by Vahl’s former master, have begun to move. Vahl did not recently animate them and cannot reliably command them. The players can investigate, retreat, negotiate for records, or pursue the fleeing scholar. The site should not trap the party in a compulsory dungeon.
3. Laboratory Diagram
This is a simple GM-facing schematic, not a scale battle map. Each room connects through a stone or timber doorway. Room 1 is the visible laboratory; Rooms 2–5 form the older annex beneath the hill.
                      NORTH
                 [5] SEALED STUDY
                        |
                 [4] BONE CHAMBER
                        |
[2] STORES ---- [3] PREPARATION ROOM
                        |
                 [1] MAIN LABORATORY
                        |
               ENTRANCE FROM ROAD

Alternative escape: a narrow service passage
from Room 3 to a brush-covered hillside exit.
Map key: 1. Main Laboratory; 2. Reagent Stores; 3. Preparation Room; 4. Bone Chamber; 5. Sealed Study. The service exit from Room 3 is concealed behind a storage rack and emerges in scrub above the building.
4. Room-by-Room Encounters
| Room | Description and encounter | Useful discovery |
|---|---|---|
| 1. Main Laboratory | Tables of glass vessels, dried fungi, anatomical drawings, and a ledger of purchases. Vahl or Lenna may be present. | The purchase ledger is genuine; it records research materials, not deliveries to poisoned wells. |
| 2. Reagent Stores | A cramped room of sealed jars, labeled salts, herbs, and preserved specimens. A broken shelf creates a spill hazard. | Inventory discrepancies reveal that several pages and samples were taken during an earlier unauthorized visit. |
| 3. Preparation Room | A stained stone bench and a screened drain. A concealed passage leads to the hillside. A dormant animated corpse may rise if the old ward is disturbed. | Scratches near a rear cabinet and missing notes show that someone accessed the research without Vahl’s consent. |
| 4. Bone Chamber | A small ossuary used for prohibited anatomical study. Two animated dead stand watch over a locked inner door, following orders issued long ago. | The guardians protect the sealed study, not the plague formula. Their presence points to a more powerful former master. |
| 5. Sealed Study | Dusty shelves, an old writing desk, coded correspondence, and a partially erased sigil. The room belongs to the absent master. | A letter fragment and unique sigil provide an independent lead into a larger campaign. |
5. Encounters and Danger
Use a small number of animated dead suitable to the party’s system and level: one isolated corpse in Room 3 and two guardians in Room 4 are the default. They are slow, persistent, and bound to specific locations. The Game Master can replace them with skeletons, zombies, or system-appropriate equivalents. Their instructions are to defend the sealed study, not hunt townspeople.
- Warn before danger: Scuffed stone, disturbed dust, and the sound of movement give attentive players a chance to prepare.
- Noncombat options: Players may bar doors, bypass the guardians through investigation, or leave the annex entirely.
- Escaping Vahl: The concealed passage lets him escape into a nearby hillside hovel or cave. It is a possible pursuit scene, not an automatic chase.
- Treasure: A modest cache of alchemical supplies, valuable instruments, and research notes is more fitting than a large hoard.
6. The Toxin Evidence
The key investigative result is that Vahl’s research describes compounds that can cause spasms, disorientation, and compulsive muscular movement when introduced into water. His work is dangerous, but his records do not show that he prepared or distributed the poison used in Stahlburg or Vauclerc.
Lenna can explain which ingredients she purchased and when. Comparing those dates with the outbreaks reveals that another person had access to relevant information. The missing samples, torn research pages, and signs of unauthorized entry support the possibility of theft or copying.
Essential clue, not gated by the dungeon: The purchase ledger and testimony from Vahl or Lenna can establish the research connection in Room 1. Clearing Rooms 2–5 may strengthen the case, but is never required to advance the Dancing Plague investigation.
7. The Master’s Separate Mystery
Vahl once studied under an older necromantic scholar known in surviving correspondence only as the Ashen Rector. The Rector departed years ago, leaving the annex, its undead guardians, and a sealed study behind. Neither Vahl nor Lenna knows where the Rector is now. The Rector is not responsible for the Dancing Plague, the poisoning, or the revenge murders in this adventure.
In Room 5, the party may find a wax seal marked with a black tower beneath three stars and a fragment of a letter referring to the vault beneath the drowned abbey. These are seeds for a different adventure. The Game Master can decide later whether the Rector is an enemy, patron, rival, or simply the subject of a lost expedition.
The optional thread should remain distinct: no clue in this dungeon is required to identify the plague murderer, and no information about the Order of the Sacred Vigil is hidden behind the Rector’s guardians.
8. If the Party Pursues the Necromancer
Vahl’s escape passage emerges near a cramped hillside hovel built over a natural cave. He may shelter there, burn incriminating-looking but unrelated papers, or try to bargain. A party that captures him can question him about the missing research; a party that lets him go can still use Lenna, the ledger, and the laboratory itself. His fear of prosecution is understandable given his prohibited studies.
If the Game Master wants an extra scene, the hovel contains a narrow storage chamber, a second exit, and old wards that no longer function reliably. Keep it brief unless the group explicitly wants a longer detour.
9. Outcomes and Returning to the Main Mystery
| Player choice | Result |
|---|---|
| Question Vahl or Lenna | Learn that the relevant toxin research existed and that outsiders may have accessed it. |
| Search the laboratory | Recover purchase records, missing-page evidence, and signs of unauthorized entry. |
| Explore the annex | Face animated dead and possibly discover the Ashen Rector campaign hook. |
| Ignore the dungeon | Continue the Dancing Plague mystery with the essential laboratory testimony and records. |
| Accuse Vahl of poisoning the wells | His dangerous research makes him suspicious, but the evidence does not establish that he committed the crimes. |
10. Next Step: Follow the Theft
The party now has a stronger question: who acquired the necromancer’s research and used it to poison the wells? The next stage should compare the timing of the missing notes, ingredient purchases, suspicious visitors, and the deaths of Order members. That investigation leads toward the person conducting the revenge campaign without making the Ashen Rector a hidden mastermind.